


Contents
- Overview
- Sign in to Command Center
- Selecting a Receiver
- Data transmission panel – Live and record mode tabs
- Record mode operations
- Record mode
- Recorded content panel
- File Management panel
- Preview, mark, and download stored data
- File management – Pause, play, delete, and convert stored data
- Accessing downloaded files from the local storage directory
- FTP upload service
TVU Command Center File-Based Workflows User Guide
This companion user guide supplements the TVU Command Center User Guide.
Overview
This guide explains how to use the File Management, Live, Record, and Transcriber mode operations in the TVU Command Center Advanced control pages’ Data transmission panel.
Sign in to Command Center
To Sign in to Command Center, complete the following procedure:
- Launch Command Center and authenticate your account; Enter your Email and Password or use an SSO method.
- Click Sign In.
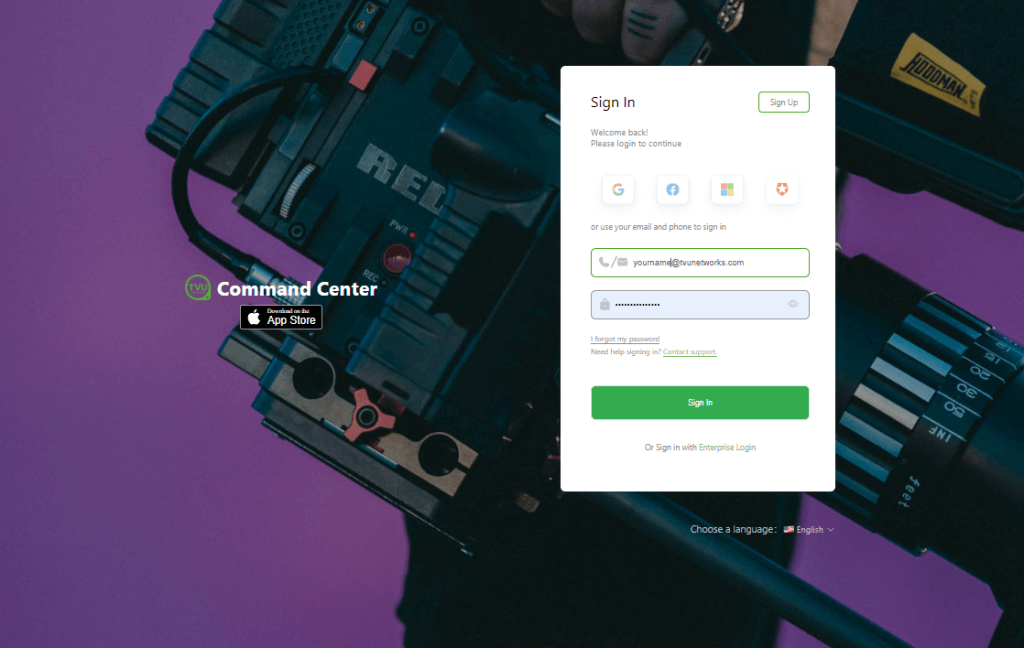
The Command Center Route page displays.
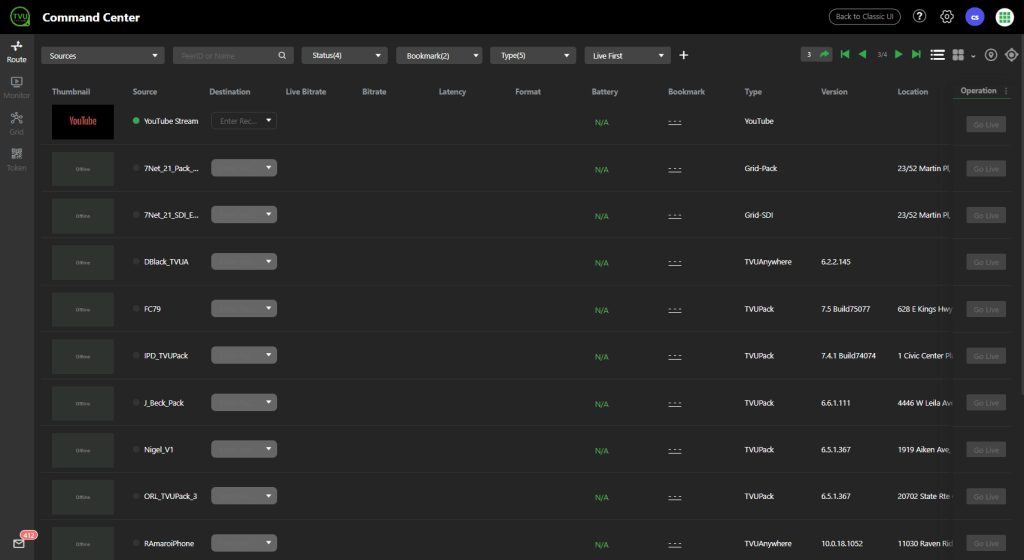
Receiver selection menu
The Command Center Receiver Control page displays receivers paired to a user’s Command Center account.
In the top-left navigation, click the Sources drop-down menu and select Receivers.
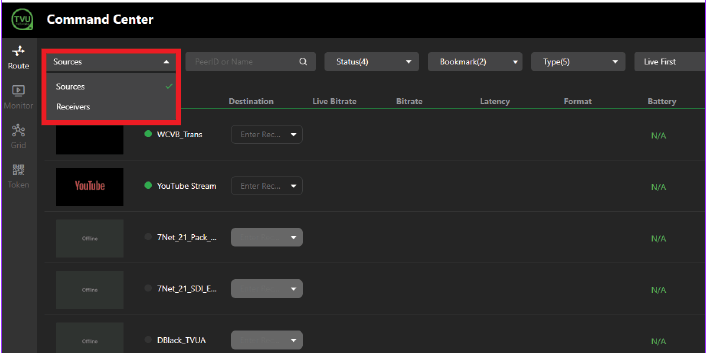
The Receiver Control window page opens.
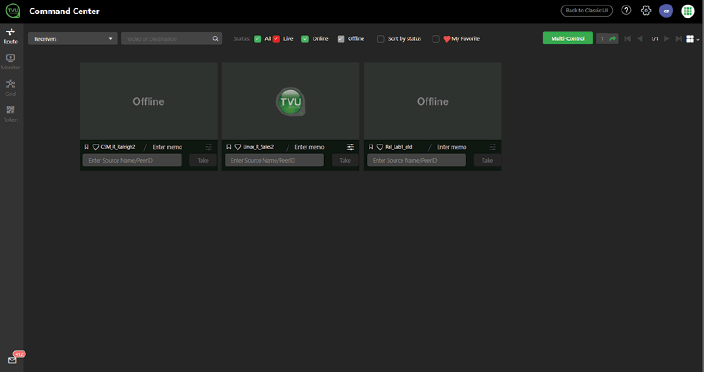
The receiver thumbnail has elements that should already be familiar to you, such as the receiver name, source selection drop-down, and the Take (Live) button. A new addition to the source thumbnail block is the memo text box and Advanced icon.
The Advanced icon is below the source thumbnail block window on the receiver control page.
Click the Advanced icon to open the Advanced Control page for a specific receiver.
The Live, Record, and Transcriber tabs are in the Advanced Control page data transmission panel, as shown below.

Data transmission panel – Live, record, and Transcriber mode tabs
The data transmission panel’s Live, Record, and Transcriber tabs control different modes of operation:
(1) Live mode: The Live mode is the primary interface used during a Live transmission. When the Live tab is selected, the Bitrate, Delay, and Operational Mode buttons display. In addition, the status of each of the data card network connections is displayed in the data card panel.
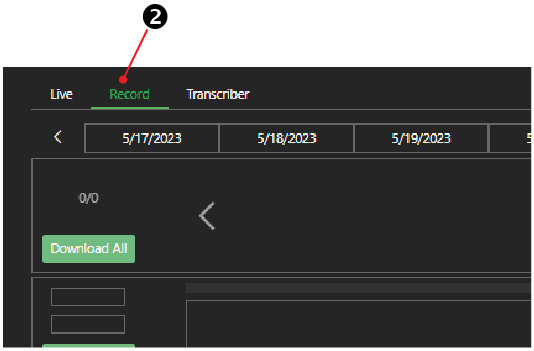
(2) Record mode: The Record mode displays the store and forward interface that allows users to preview, download, and manage TVU Transmitter stored footage and files transferred via Auto Sync. Files transferred via FTP can also be accessed via this interface.
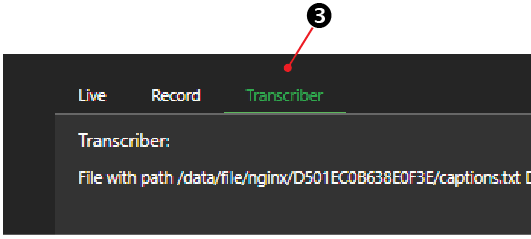
(3) Transcriber mode: Click the transcription tab to display transcribed text when enabled. The captions.txt file can be accessed in the File Browser interface.

Record mode operations
The Record tab displays recorded content timelines and file management operations.
Record mode
Whenever a video source is connected, the TVU transmitter automatically creates a new recording on its internal SSD in a FIFO loop. Each recorded clip is displayed in the Recorded content timeline in the Record tab.
This recording utilizes two separate encoders that are used for the Live transmission. This ensures that a high-quality version of the content (whether Live or not Live) is available.
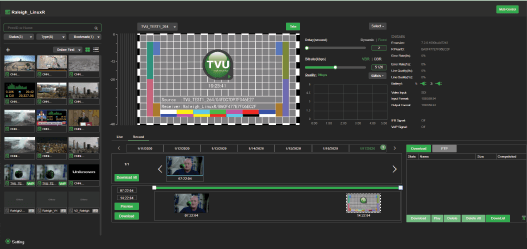
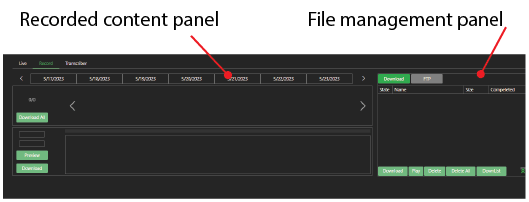
Recorded content panel
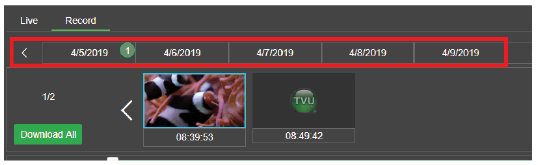
The recorded content panel has the following controls and functions:
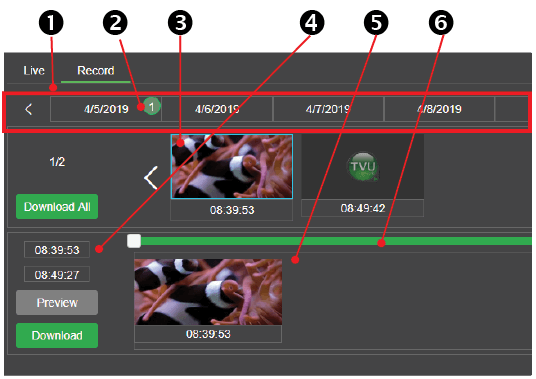
(1) Recorded content timeline: The timeline displays clips initiated by date.
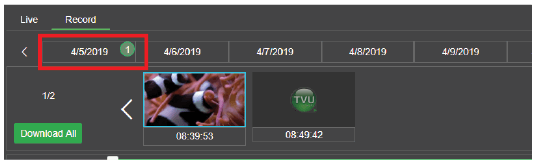
(2) Number of clips indicator: The green-circled numbers next to the date indicate the number of clips available. Refer to the recorded content timeline as shown below.
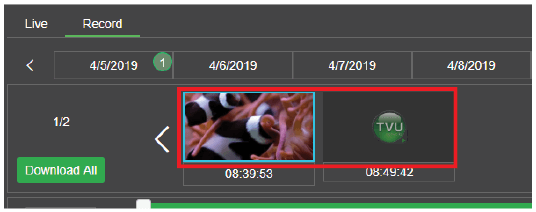
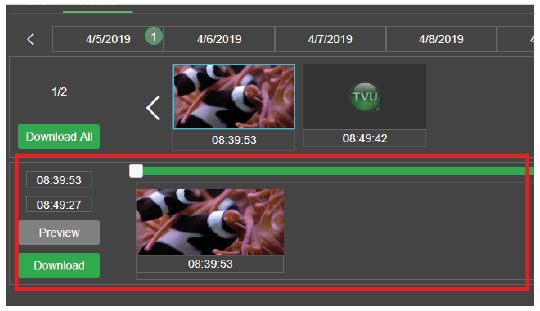
(3) Clip thumbnails: Thumbnails of selected clips are displayed below the recorded timeline. The start time for the clip also displays below the thumbnail. The currently selected clip is outlined in blue.
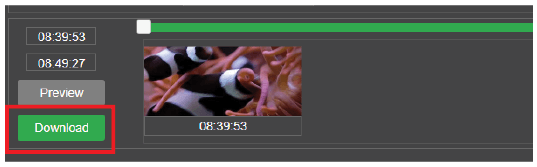
(4) Clip duration: When you highlight a thumbnail, its start and end times appear in the left column below the “Download All” button.
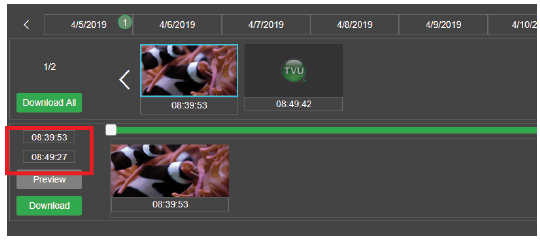
(5) Clip extraction timeline: A thumbnail of an extracted clip displays and can be edited in the clip extraction timeline.
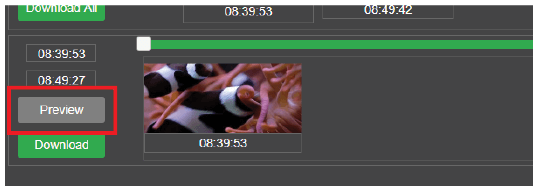
(6) Clip scrub bar: Thumbnails by frame of a selected clip can be marked by sliding the white beginning and ending markers on the green clip scrub bar.
After a clip is scrubbed, the user can preview the clip by pressing the Preview button, which initiates a live transmission of the clip.
Click the Download button to transfer the clip to the File Management panel. The download status displays in the Download tab records list during the download.
File Management panel
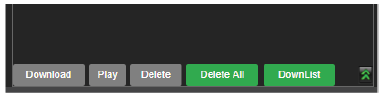
The File Management panel has the following controls and functions:
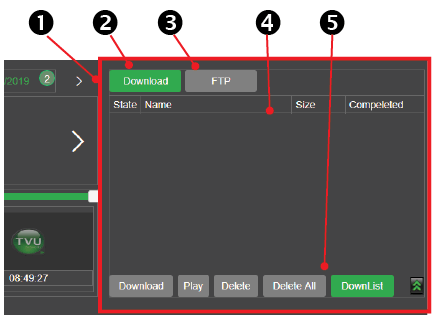
(1) File Management panel: The File Management panel provides the controls to view, delete, download, and export stored data.
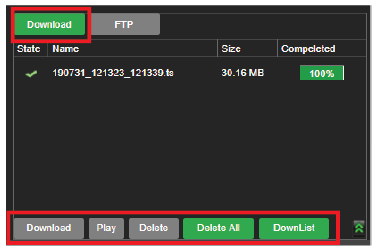
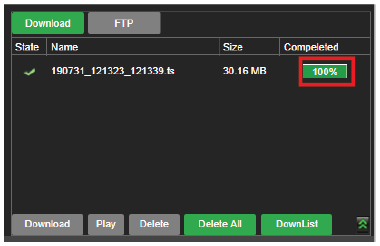
(2) Download tab: The download tab displays clips downloaded from a TVU transmitter. After a clip status displays 100% downloaded, the stored data can be viewed, deleted, or exported using the playout and control functions within the File Management panel.
Note: A file may be played before the transfer operation completes.
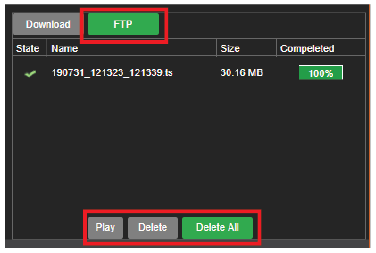
(3) FTP tab: The FTP tab displays files uploaded from an FTP client. The stored data can be played or deleted after a clip status displays 100% uploaded.
(4) Record list: The record list in the download tab displays clips downloaded from the recorded content panel.

(5) Playout and download controls: After a clip has completed the download process, the stored data can be viewed, deleted, downloaded, or exported using the playout and control functions.
Preview, mark, and download stored data
To preview, mark, and download recorded transmission, complete the following steps:
- Click the Record tab in the data transmission panel to open the Recorded content panel.
- If the TVU Pack is in Live mode, select Stop in the source panel’s top right corner. This will stop the live transmission and change the status to standby.
The system is now ready to manage the stored data. The downloaded, stored data is paused if you need to return to live mode. The download process will resume when the live transmission is stopped again.
- Review the recorded content timeline. Select the desired clip from the green numbered clip indicators.
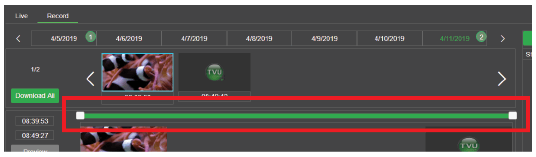
- Locate the green scrub bar (1) in the “Recorded content panel.” Slide the left start cursor to the start of the time selected (Mark in).
- Slide the end cursor to the end of the time selected (Mark out). After a few moments, the system will generate thumbnails of the in and out points.
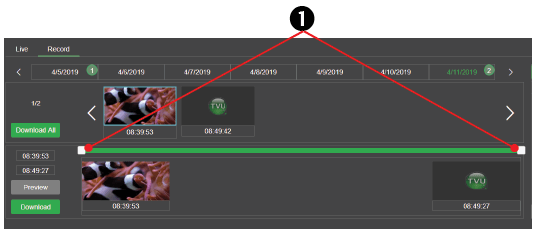
- After completing the mark-in and mark-out points, click the Download button.
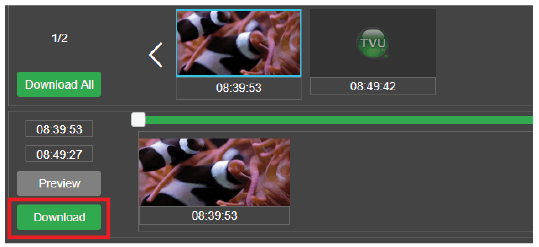
- Refer to the File Management panel Download tab to see the download status. Ensure the file download status displays 100%.
File management – Pause, play, delete, and convert stored data
The File Management panel Download tab displays a list of clips downloaded from the recorded content timeline. The File Management panel allows users to pause, play, delete, and convert recorded content.
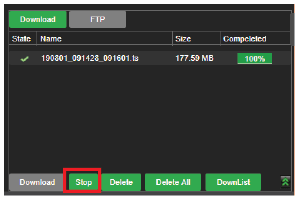
Pause and resume a file download
Complete the following steps to pause and resume the download process of stored data:
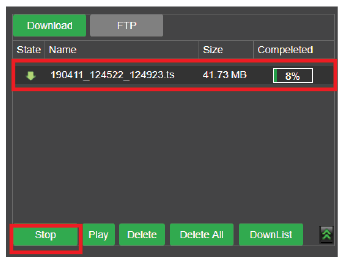
- Before the download completes, select the file and click the Stop button to pause the download.
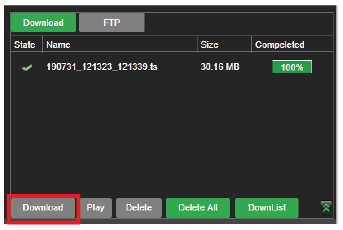
- Click the Download button to resume the download of the file to your local drive.
Play a file
Complete the following steps to play stored data from the File Management panel:
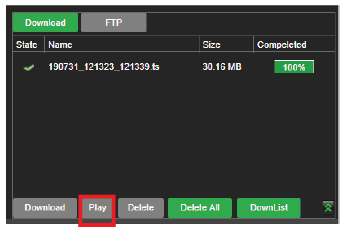
- Select the file from the file list and click the Play button to play a file.
- To stop the file from playing, click the Stop button.
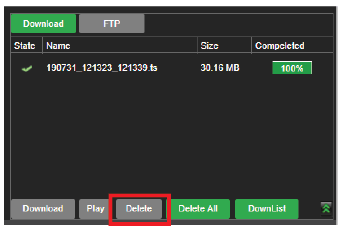
Delete a file
Complete the following steps to delete stored data from the File Management panel:
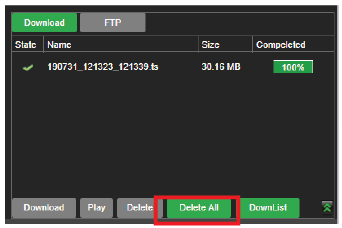
- Select the file from the file list and click the Delete button to delete a file.
- Click the Delete All button to delete all files in the file list.
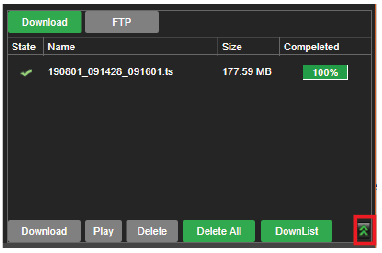
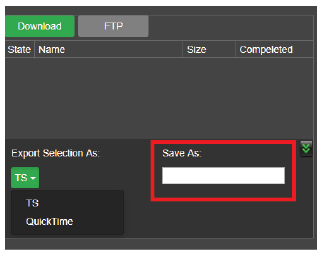
Exporting a file
Complete the following steps to export stored content into the TS or MOV file format:
- To export stored content, click the green arrows to open the export menu.
- Click the TS drop-down menu and select an Export format.

- Click the Save As field and enter a name for the file export. Click the Export button to download the video on the TVU transmitter to the receiver.
- The file transfer is complete and ready to be played out after the “Completed” column export status reaches 100%.
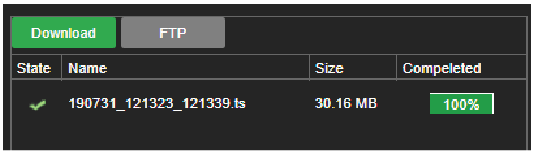
By default, the file is written to a local storage directory where the last characters are the unique PID of the TVU Pack. On a receiver paired with multiple packs, there will be one folder for each paired pack.
Accessing downloaded files from the local storage directory
To access the downloaded files and recordings on the receiver:
- Open the Advanced Control page.
- Click the Setting gear in the top-right panel.
- Select File Browser.
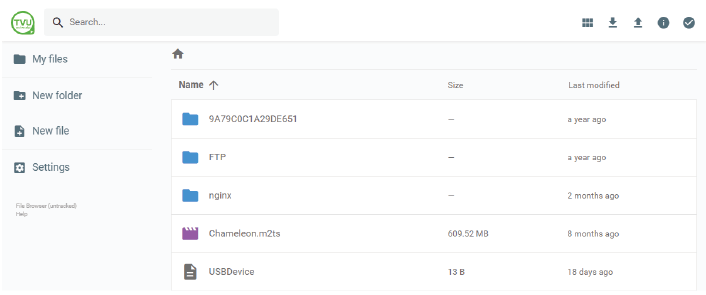
The File Browser Root file directory displays.
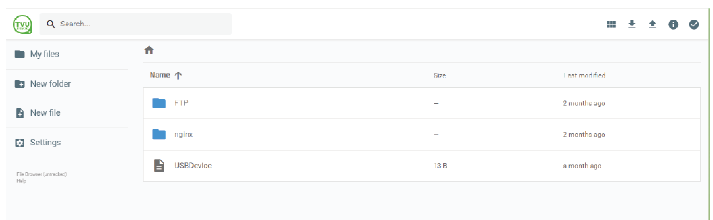
- Click the My files folder.
Complete the following steps to access your downloaded content from the File Browser page:
- Click Settings > File Browser n the Command Center user interface top-right panel to open the File Browser Root file directory.
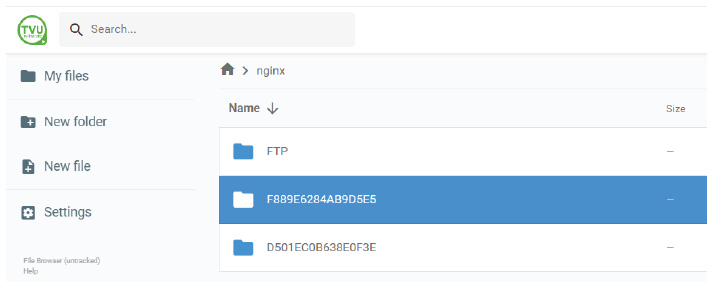
- Open the nginx folder and select the Receiver folder name.
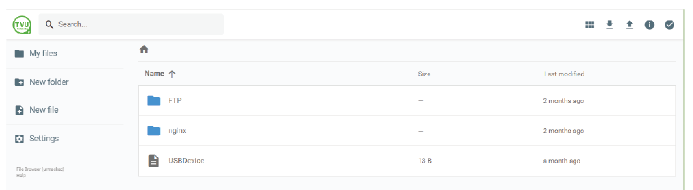
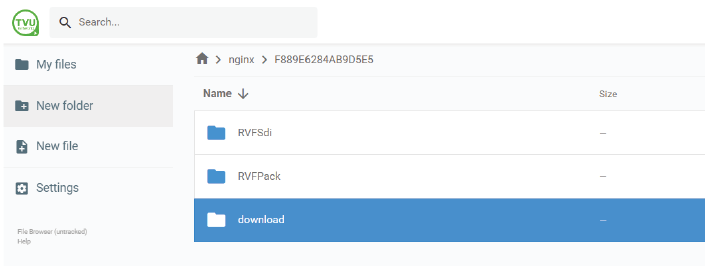
- Click the download folder to display the Packs’ unique PID folder(s).
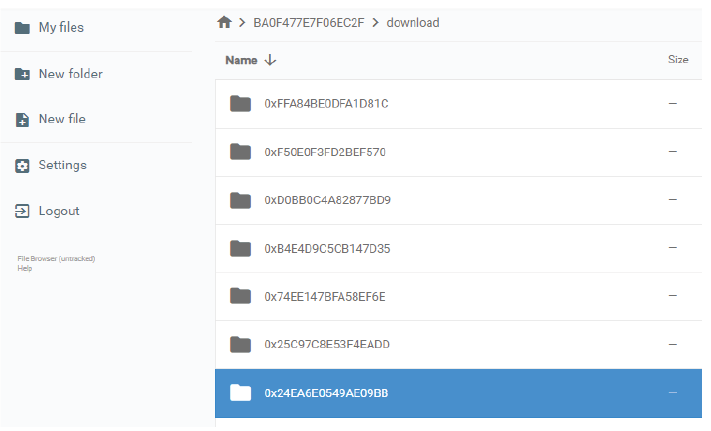
- Click the Packs’ PID folder to display the downloaded file(s).
- Select the file(s) you want to download.
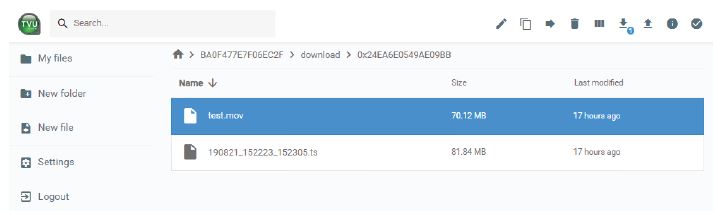
- Click the Download icon in the top-right corner of the page. You can select and download multiple files at one time. The number of downloaded files is displayed in a blue circle next to the download icon.
- When finished, close the window.
FTP upload service
The FTP upload service allows users to automatically copy downloaded files from the TVU receiver to an FTP receiver.
- To access the FTP upload service, click Settings in the Command Center user interface and select Remote File Storage.
The Remote File Storage window opens.
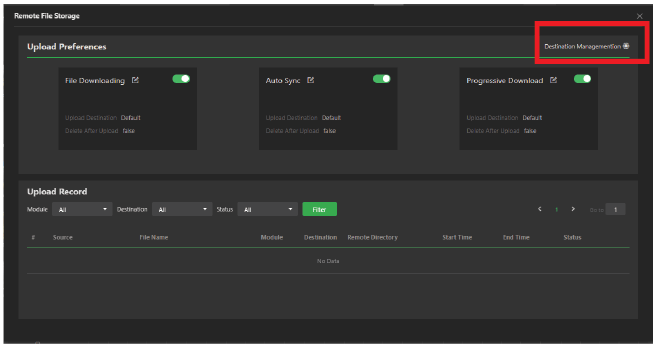
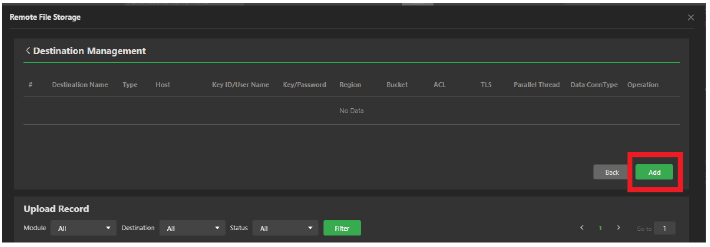
- Click the Destination Management icon in the top-right corner.
- Click the Add button in the top Destination Management panel.
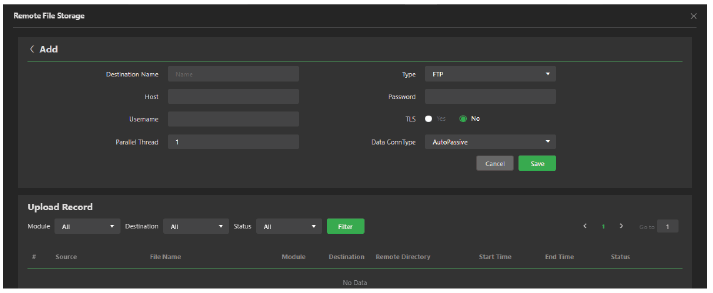
- Enter the following information into the Destination List panel:
- Enter a Destination Name
- Enter a Host IP address
- Enter your User Name
- Enter your Password
- Click Save. Your FTP destination is now configured.
From this point onward, all downloaded content from TVU transmitters and content uploaded via the AutoSync feature will be copied to your FTP destination.
TVU Networks® Corporation, © Copyright 2023. All rights reserved in all media
Document Part Number: TVU Command Center File Based Workflows Rev A EN 07-2023